Showing posts with label tutorial. Show all posts

Thursday, August 21, 2014

Blueberry Applesauce!

My whole family loves fall.  I think it's mostly because that's when I start making and canning applesauce like the apocalypse is coming.  

Given the time, I'll use an entire orchard of apples to make applesauce every year.  The kids would probably live on it if I let them!  

I add spices for flaver - but that certainly isn't necessary. I also do not add any extra sugars or preservatives.  

I buy my apples from local orchards and often they are organic (without being labeled organic because they are from small, local orchards). 


Ingredients:
Apples - I prefer golden delicious, but really any apple will work
Water -  about a cup
Cinnamon - to taste
Nutmeg - this is my secret ingredient
Bonus fruit - anything will work.  Citrus and "soft" fruits like kiwi and banana don't work out so well.


1. Using a vegetable peeler, peel the apples if desired.  I do this only about half the time.  Lots of important nutrients and vitamins are in the peels.  It can alter the color of applesauce though.
2. Core and dice apples.  Try to keep the pieces about the same size.
3. Add apples to a large stockpot or pan.  Add a little water - this prevents the apples from burning to the pan before they soften.
4. Add spices and bonus fruit.  Mix and cover.


 5. Cook on medium heat until it looks like this stirring occasionally.  Because fruit has natural sugars, it will burn to the pan if left unattended too long.  Eventually the fruit will turn to mush all on it's own.  Depending on your apples and preferred consistency, you may want to use a potato masher or blender to make it more smooth.

Taste to ensure the flavors are what you like.  You can add more spices at this point if desired.

Note: Blenders, food processors and emulsion mixers will puree the applesauce and make it more like baby food.


6. Put some in a bowl and eat!


I also can as much as I am able.  I use mason jars and the waterbath method.  You can learn about it and follow these canning steps here.

I love knowing my family is getting fresh fruit all year-round that has no added sugars, is packed full of yummy goodness and they made it with me (most of the time).

It's much easier than most people think and the benefits are so very rewarding!

Tuesday, August 19, 2014

Steampunk Cornell Box

 This is my first attempt at making my own Joseph Cornell inspired artwork.

His "collection" boxes are so cool.  My theme (obviously) was Steampunk.  The background of the piece is a sheet of antique book photocopied and cut to fit.  I think it took 4-5 sheets total to cover the whole box inside and out.


The box is made from an empty cereal box.  Most of the items inside were either found or bought.  Info about the robot is below.  Lots of the gears and larger electronic-looking pieces were taken from an old broken electric pencil sharpener I took apart.  Best. Idea. Ever!


The robot is actually a mini wooden manikin painted black and dry-brushed silver.  You can get yours here.  His eyes are brass eyelets and the gears are tiny watch gears.


 This is the "lid" to the pencil sharpener turned upside down, the motor from the sharpener glued to it, a light bulb from home and copper craft wire.  Anything that needed to look "old" was painted either black or rusty brown and then I dry-brushed metallic paint over it to give it a metal look.  In the background are more gears from the sharpener.


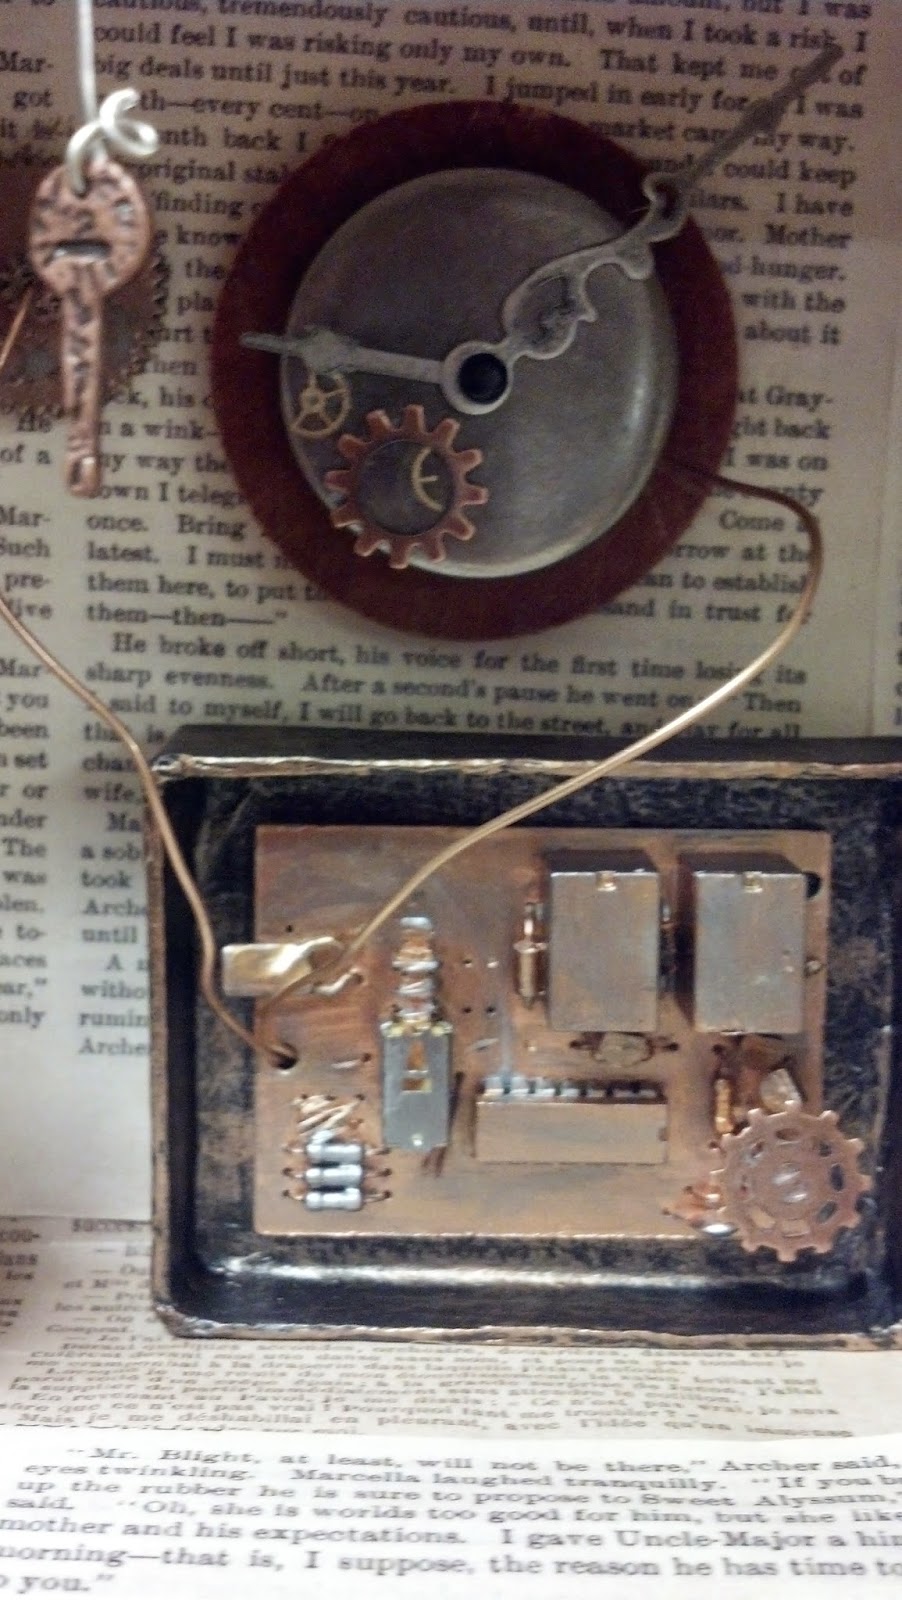
 This is the circuit board from the pencil sharpener inside a little paper mache box lid.  I painted it all brass, copper and grey.  The clock hands were purchased form Michael's and the metal disc is another piece of the sharpener.  I added wires to hook it all together.


This is a small wooden spool wrapped in copper wire attached to a large plastic disc from the sharpener I painted rusty copper - to which I glued gears, wire, another even smaller wooden spool and a toy compass.  It was tricky to get this to stand upright, but after some fiddling, it worked.

Other materials I used:
copper brads on the outside of the box to look like rivets
other steampunk-like gears & stuff - purchased from Michael's
1/2" foamboard - I drew and cut out a couple of my own gears, painted them black, then dry brushed a metallic silver or copper over it.
Aleene's Turbo Tacky Glue (I LOVE this glue!)


Tuesday, October 1, 2013

Junkins


For Halloween, I borrowed the idea of making a junk pumpkin rather than carving it.  Disney Family Magazine... you are my inspiration!  Worth every penny.  

I raided Grandad's garage the week prior and our garage the Night of the Creating.  It was SUPER fun!  My kids loved pounding stuff into the pumpkins WAY more than carving and scooping out the guts.  No one got hurt and I wasn't worried someone would saw off a finger by mistake.

My youngest entered his in his school's Fall Ball Pumpkin Contest and won for his grade!!    His pumpkin was an alien/scared person pumpkin.

My oldest decided his needed a mustache and by the time he was done, we referred to him as the Mr. Pringles Pumpkin.


This is something we will definitely do again next year!

Friday, May 17, 2013

Fairy Garden Mushrooms

One thing all fairy gardens need: mushrooms!

Once again I grabbed my sculpey and started creating.  Here was my process:

Materials:
White Sculpey
14-gauge wire
Acrylic paint


 First I cut the wire into 6" lengths.


Then using the sculpey, I molded a mushroom.


 I inserted the wire into the mushroom base.  I made sure to reform the base to make sure the wire was in there snug so it won't fall out later.

I baked them in the toaster oven at 325 for about 13-15 minutes.  


 After they cooled, I broke out the acrylic paint and painted the mushroom caps red.  Next time, I will probably use red sculpey for the caps.  It would be much easier than painting and the color would be richer.  Finally, I applied a coat of glitter mod podge to the caps to add some sparkle.  Then I added a matte mod podge to the stems to seal them.


Viola.  Mushrooms!  Or as my loving hubby calls them - little... well, use your (dirty) imagination.    

Next on my list: Snails!  And more/better mushrooms!

Thursday, May 16, 2013

Fairy Garden Stepping Stones


I've decided to use my creativity to make my flower bed a little more whimsical.  Seeing the Pinterest posts for fairy gardens really inspired me to give it a try.  After all, Fairy Gardens are ALL the rage.  Not only do I have an entire board full of pins and ideas and spent a few (many) evenings on Etsy looking up fairy garden ideas and figuring out how to make things myself.

For my fairy garden, it's going to be a process.  I am making it a bonding experience with my 4-year old step-daughter.  We will clean out the flower bed, make it pretty, add nice flowers and make it "welcome for the fairies" and the morning before she comes for a visit, I'll add something new to the fairy garden.  Eventually, the fairy will officially move in (ie. there will be a door).  

One of the first things I wanted to do was make the stepping stones.  

Materials:
White Sculpey
Black Sculpey
Sculpey Conditioning Machine (like a pasta maker)
Glass seed beads
Glitter Mod Podge


First I mixed the white with a little black and ran it thought the conditioner machine to make it soft.  If you have ever worked with Sculpey, you know what a pain in the ass it is to start working.  It's hard and sometimes crumbly if it's old.  The conditioning machine makes it a million times faster and easier and saves your aching hands.


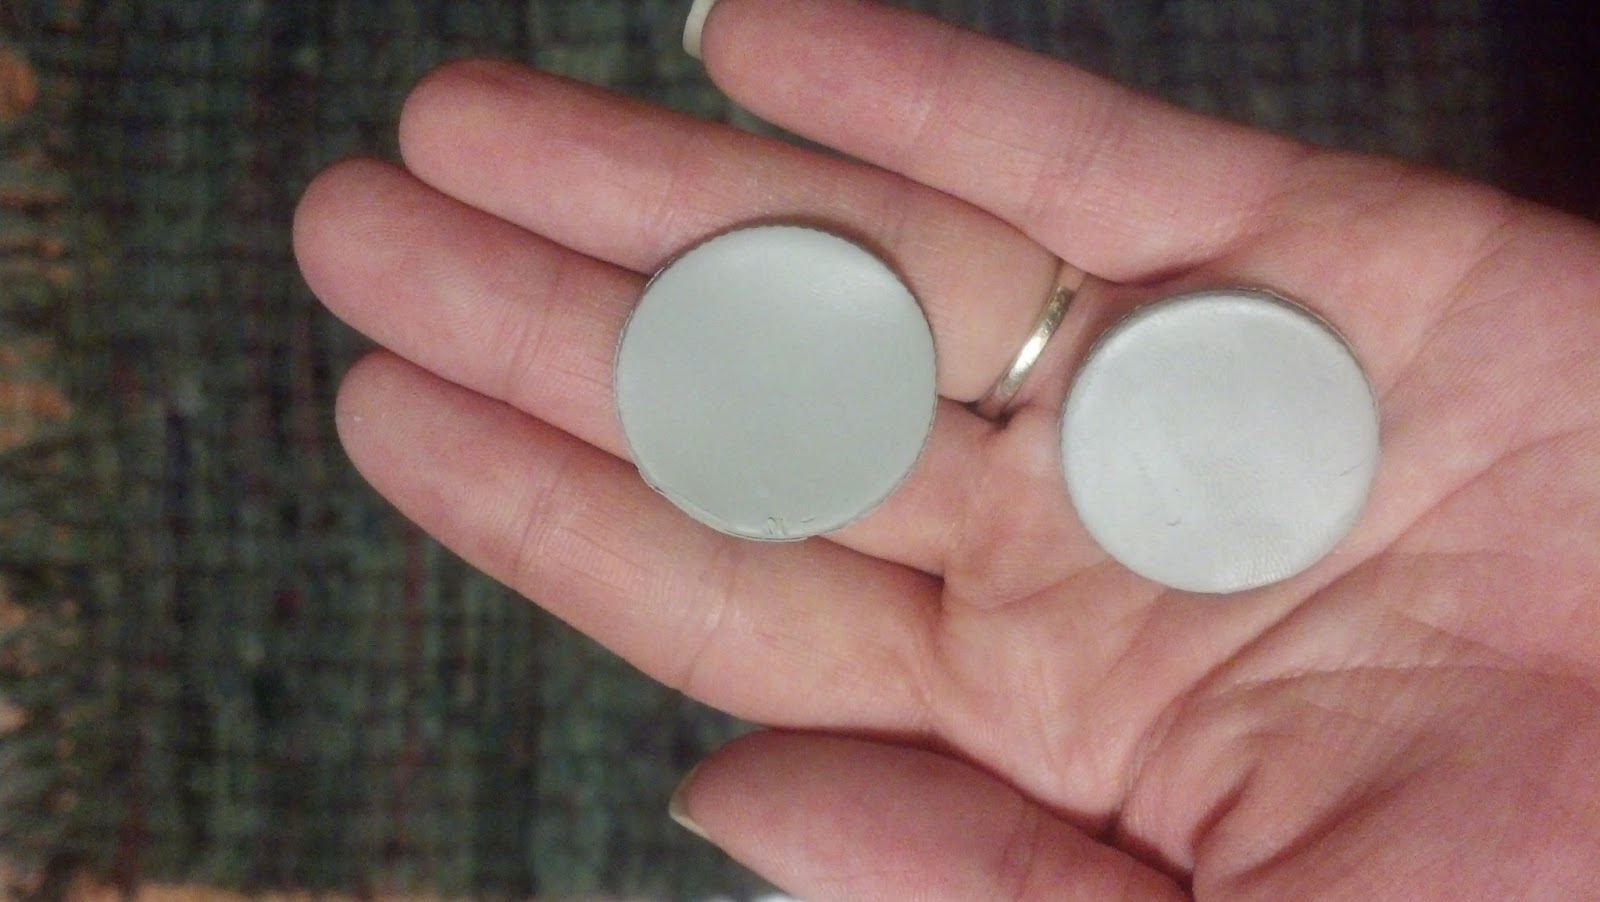
Next I cut out little circles.  I used the cap to my rum bottle. It was the perfect size and conveniently the rum was open and on the counter so I made myself some summer lemonade.  


I dipped the clay circles into the seed beads.  Then I pressed more into the surface to make sure the whole thing was covered.  Make sure you use glass beads.  Plastic beads might melt in the oven when you bake the clay.  Also, plastic fades and as it is outside exposed to the elements, the color may dull.


Here's what it looks like covered in beads.


 Bake at 325 for about 10-15 minutes.  I made sure these were about 1/4" or so thick so they don't move around too much in the flower bed.  If I make more, I may put a wire in the bottom to help them stay still.  

Once they were done baking and cool, I painted a layer of glitter Mod Podge over the top to help seal it and add another sparkle element.  Once dry, I flipped them over and painted the backs and sides.


 Here is the completed path on the ground.  (Sorry for the blurry pic.  Camera phone.)

Also on my to-make list: a door, windows, tire swing, mushrooms, snails, a bird house, a bird bath, a garden gazing ball and anything else I can dream up!  Look for more fairy garden tutorials and ideas soon!

Friday, May 10, 2013

Paper Fusion Lantern Kit


For wine and chatter girls craft night I found these two lanterns and wanted to give them a try.  
They were a little on the pricey side for an unfinished craft, but the light was supposed to be extra fancy-pants and the novelty of making a lamp that would be whatever I wanted was pretty appealing.


The kit is called Paper Fusion comes with 4 unfinished square sides and a brace bar, instructions, a LED light bulb with cord and switch, translucent papers for making your own design/collage/glitter disaster, and metal screws.


I picked an assortment of metallic paint because I wanted some glittery parts.  Liquid Metal acrylic paint is one of my favorite metallic paints.  It's affordable and it looks amazing!


 First poured a glass of wine.   Then we painted all the sides and then glued the paper to the back.  


This is the view from the front.


 We lightly glued the sides together. 


Then we screwed the brace to the sides and the light base to the bottom.


2 hours and a bottle of wine later, this is the finished product.


Here is the other one we made.  Cool how close the paint matches the paper, huh?

Overall review:
It is a cool product.  The options to be able to make it your own and make it match your color schemes was awesome.  It was easy to make, the directions easy to follow.  They are made of pine/soft wood which makes them take paint easily.  One coat was all I needed.  The light bulb is super cool.  It truly does not get hot and I feel completely safe putting this light in the kids' bedrooms.

Complaints:
  • The screws were NOT easy to use.  The pre-drilled holes were not quite clean enough for the screws to easily go in.  
  • They are pricey.  For more than $30 each, they are not all that considering you need to add your own paint and paper - unless you want unfinished with translucent film.
  • The "Free $6 light" is a little misleading.  It's not free.  It's wrapped up in the price.
Compliments:
  • You can truly make it match whatever you want given the unfinished wood and zillion paper choices - or by using your own paper.
  • Directions are easy to understand.
  • Light is bright enough for thinner papers to still give a glow, but not overwhelmingly bright when using translucent film.
  • The light is LED - less energy used to use it!  Yay!
  • Light truly does not get hot.  Making me feel completely safe putting this in a kid's room and not worry about the paper smoldering.


Thursday, May 2, 2013

Tinted Mason Jars


My bestie was having a baby shower and I was in charge of decorations.  It was going to be outside and we were using all sorts of bright colors as the theme.  (No, they're not finding out.)

I wanted to do something fun and was in a Mason Jar kick.  So I looked up how to tint mason jars.  The ones I saw online were BEAUTIFUL!  Mod Podge and food coloring.


 I followed the directions carefully.  Mix food coloring with a little water.  Add to Mod Podge (glossy).  Spin and cover entire inside of jar.  Pour out excess.  Bake upside down in 200 degree oven for about 1/2 an hour.  Check.  If not clear, back another 20 minutes and keep checking.


Well, mine never got really clear.  They were more streaky and gloppy.   
 I ran out of Mod Podge and looked around for something else.  Something clear.  Something that would mix with water and dried hard. I dug through my art boxes, drawers, storage totes, closets (it's embarrassing, I might have an art/craft supply problem...) Liquitex to the rescue!  
I found a bottle of Pouring Medium and decided to give it a try.
NOTE: Liquitex Pouring Medium is NOT food-safe.  Do not eat/drink from the tinted jars!


Once again, I mixed the food coloring with a little water to break up the pigments.  Then I mixed some pouring medium in with it.  I kept it dark because I knew it would dry lighter.  I tilted the jars to totally coat the insides, then turned it upside down on a paper bag (to catch the drippings)  After about 1/2 an hour, I did a second coat in the same way.  I left the jars upside down for another 1/2 an hour or so, moving them once and a while to make sure they were not going to stick to the paper bag.


I then moved them to wax paper (still upside down) and let them dry for the night.

The next morning, I turned them right-side up and let them finish drying for a couple days.  Just to be safe.

(Worth noting again) NOTE: Liquitex Pouring Medium is NOT food-safe.  
Do not eat/drink from the tinted jars!


The finished jars as centerpieces.  I crinkled some decorative cellophane and put the rings back on with a cut artificial flower. They turned our lovely and with the cellophane inside, you could hardly see the streaks & glops from the green Mod Podge batch.

Thursday, April 25, 2013

Melted Crayon Paintings


I would like to take this opportunity to thank Pinterest for several things:

1. For giving me a single website with infinite creative resources
2. For giving me a single place to store ideas with visual representations to make my ADD brain happy
3. For sealing my time (lots and lots of time)
4. For making my friends think I am more creative than I actually am 
5. For helping stimulate the economy via me buying all kinds of craft crap that I never find time to touch once it is out of the shopping bag.

My first attempt on a 5x7" canvas.
Lots of people have seen this crayon "painting" on Pinterest.  
I had a dire need for creativity one evening, so I decided to make one.  

The process is pretty basic:
1. Glue [new] crayons to a canvas.  I started small - with a 5 x 7" canvas.  
Then if it sucked, I could stuff it in the trash and no one would be the wiser.
2. Using a heat gun or embossing tool, melt the crayons until they drip.
Lay down lots of paper underneath or you will have one heck of a mess! 
Those who said you "can do this with the sun" are nuts.  I can only imagine that working if you live in the desert and want a puddle of all one color - brown.
3. Let cool a few minutes.
4. Brag to your friends how clever you are.

I found the embossing gun worked better than a heat gun.  The embossing gun was smaller and I had more control. I ended up making 3 total crayon paintings and here are my tips:
  • Sort your crayons first!  Lay them out so you know how many your need and try to keep the colors evenly represented. BTW - Crayola - how about some more yellow's!?
  • Keep the heat source a bit away from the crayons, they melt pretty easily and you will get a puddle if you're not careful.  Move it closer to melt, then further away as it drips.
  • Carefully re-melt any thick spots that may have settled in the middle of the canvas.  
  • Tilt the canvas a little to get the colors to run in the patterns you want.
  • Try to work one color at a time to keep the true color to the bottom of the canvas.  The colors will mix together as they melt which makes cool new colors, but keeps you from seeing the true colors throughout the canvas.
  • Keep your board on a 45 degree angle (or so) to drip.  This will allow the colors to run slowly down.
  • In order to fill an 8x10 or 11x14 canvas, you will need to melt the crayon beyond the surface.  To do this, hold the canvas flat on the table, hold the heat gun about 6" away from one color and leave it there a few seconds.  Then tilt your canvas 45 degrees.  This will allow all that melted wax to run down.  
  • Alternate areas.  Work on red, then blue, then orange then purple, etc.  This will let one color and area harden a little before re-melting it for another color.  This will also help keep your running colors more pure.  
    • I know I said this twice, but it's worth repeating.
  • Be aware of your crayon on the sides.  I have several drips down the side and on the bottom.  Be careful it is not on the "wall" side of the canvas or you will have crayon on your wall (and not in the artistic sense).  
  • Metallic crayons look pretty, but melt into shades of grey mixed with color.  I tried it (had to do something with all those leftover crayons!) and it is pretty ugly.  It's not very vibrant and mostly muddled.  
  • I used Aleene's Turbo Tacky Glue because it's super tacky (obviously) and dries quickly.  I glued them and started melting within minutes.
  • Hey - that melting tool?  Yeah, the thing that gets HOT.  Be careful with it.  And the wax.  Yeah, that gets hot too.  Don't let little kids do this.  One more thing - that hot wax - it drips. And that heat gun?  It BLOWS air.  Essentially blowing melted wax.  Use lots of surface coverings!!


 My first large crayon melt painting on an 11x14 canvas.
This and the metallic one below hang in our kids playroom on either side of 
their bulletin board where they hang all their artwork.

Metallic & glitter crayons.  Very muddy. Also an 11x14 canvas.